Audio Innovations

Car Stereos, Auto Customizing, Mobile Electronics

1105 Jim's Lane, Conway, AR 72032 501-358-6545
  • Home
  • Services
    • Car Audio
    • Driver Safety Systems
    • Marine Audio
    • Motorcycle Audio
    • Radar and Laser Detector Systems
    • Remote Starters
  • About Us
  • Location
  • Customer Reviews
  • Contact Us
  • Facebook
  • Instagram

Car Audio Myths: Does Stuffing a Subwoofer Enclosure Make It Seem Larger?

Enclosure Stuffing

There are a lot of theories around the benefits of adding stuffing to a sealed subwoofer enclosure. Most contend that stuffing makes the enclosure behave as though it is larger, allowing the woofer to play louder at low frequencies. If this is true, then adding stuffing seems like a great idea. While creating many of our articles, we conduct many low-frequency enclosure simulations in BassBox Pro. Let’s see what the software predicts and then translate that into a real-world experiment with an enclosure in our lab.

Why Do Subwoofers Need Enclosures?

Speakers, specifically subwoofers, need an enclosure to limit cone excursion at extremely low frequencies. Without the added compliance of an enclosure, the subwoofer’s cone could exceed its excursion limits at high power levels and be damaged. Therefore, when designing an enclosure for a vehicle, technicians need to balance the requirements of the subwoofer to hit a target Q-factor and low-frequency cut-off point. The enclosure also needs to ensure adequate power handling and have a volume that will fit in the desired location in the vehicle.

Subwoofer Enclosure Specifications

For this experiment, we will use an audiophile-quality 12-inch subwoofer in a sealed enclosure with a net internal volume of 1.358 cubic feet. Before we began any simulations, we measured the Thiele/Small parameters of this particular subwoofer using our Woofer Tester 2.

In terms of specifications, our simulation in BassBox Pro predicts a -3 dB frequency of 40.4 Hz and a Qtc of 0.924. That’s a bit higher of a Q-factor than we’d typically target, but the enclosure will work well in the space we have allotted. Power handling remains well below the 17.6 mm Xmax specification when driven with the 500 watts the subwoofer is rated for.

Enclosure Stuffing
Cone excursion of our audiophile-grade subwoofer vs. frequency when driven with 500 watts of power.

For reference, we compared the predicted response of our woofer in the 1.35 cubic foot enclosure to the factory-specified 1.02-cubic-foot design. Our larger enclosure will yield 1.6 dB more output at 20 Hz than the smaller design. From that perspective, it’s barely worth the extra space. What we do like is the reduction of the system Qtc from 1.001 down to 0.924. The ideal damping value (Qtc) is considered 0.707. If you’re wondering what speaker or subwoofer Q is all about, give this article a read.

Enclosure Stuffing
Predicted frequency response of our audiophile subwoofer in 1.3-cubic-foot (red) and 1.02-cubic-foot (violet) sealed enclosures.

What Does BassBox Pro Predict When We Add Stuffing?

Bassbox Pro includes three options for simulations that include stuffing: Minimal, Normal and Heavy. We repeated the frequency response simulation using these options to see what the software thinks will happen. The results from BassBox show a decrease in the Q-factor of the enclosure

Enclosure Stuffing
No stuffing – red; minimal stuffing, yellow; normal stuffing, green; heavy stuffing, white

What Happens in terms of the System Q-factor?

In the un-stuffed enclosure, we see a predicted Qtc of 0.924. In the enclosure with the minimal stuffing, the Qtc drops to 0.906. In the normal scenario, it’s predicted to be 0.837. Finally, in the heavily stuffed enclosure, the Qtc is a well-controlled 0.755. As we aren’t looking for boomy bass, adding lots of stuffing should benefit our application.

Any time you get more output from a subwoofer in a sealed enclosure, there will be a correlating increase in cone excursion. This is true for a decrease in output as well. The graph below shows the effects of simulating different stuffing levels in the software.

Enclosure Stuffing
Cone excursion increases at very low frequencies with the addition of stuffing in a sealed enclosure.

Testing Our Sample Enclosure

For this experiment, I bought a pair of the least expensive pillows available at the local Wal-Mart. I think they were $3.99 each. They are listed as weighing 0.56 pound each, so it’s reasonable to assume there is 0.5 pound of the specified polyester stuffing in each of them.

Here are the results. Pleasantly, the predictions from BassBox Pro seem to have panned out, for the most part. The chart below shows the changes to the impedance measurements as we added more stuffing.

Enclosure Stuffing

With no stuffing, the subwoofer presented an Fs of 43.35 Hz and the enclosure Qtc was 0.9532. With a half pillow’s worth of stuffing, those numbers dropped to 42.5 and 0.9148. A full pillow’s worth of stuffing in this 1.3-cubic-foot enclosure is what I’d consider tightly packed and resulted in the numbers dropping more to 42.1 and 0.919, respectively. By adding any more, I was genuinely concerned that I’d put too much in and that the density would negatively affect the performance of the subwoofer. I was wrong. The Fs dropped once again to 41.7 Hz, and the Qts was now a moderate 0.8397. That’s still a bit higher than I prefer, but the change was impressive and quite beneficial. Our simulation predicted that “normal’ stuffing would yield a Qtc of 0.836. I’ve never put that much stuffing in an enclosure. The take-away is, you need to pack it surprisingly tight.

So, does the addition of stuffing simulate a larger enclosure? It certainly seems so! If we want an unstuffed sealed enclosure for our subwoofer with a Qtc value of 0.8397, it would need to have 2.05 feet of airspace. We have a feeling that the larger empty enclosure is a little louder at the lowest frequencies. Nevertheless, we’ll take this compromise any day!

Is Resonance Control Relevant?

Look at the four graphs below, specifically at the dips around 180 and 510 Hz in the “empty” image. The interior length of this test enclosure is 26.5 inches, which is the same wavelength as a 512 Hz tone. There is a standing wave in the enclosure. The addition of more and more stuffing slowly reduces both of those little resonances.

Enclosure Stuffing
Impedance and phase response of the empty enclosure.
Enclosure Stuffing
Impedance and phase response of the enclosure with a half pillow of stuffing.
Enclosure Stuffing
Impedance and phase response of the enclosure with a full pillow of stuffing.
Enclosure Stuffing
Impedance and phase response of the enclosure with 1.5 pillows of stuffing.

These resonances don’t matter much for a subwoofer system where we already have the signal going to the sub attenuated by 20 or 30 dB by 180 Hz. However, if we were building a full-range speaker, the addition of the stuffing would make a noticeable difference in what we hear through the midrange and midbass regions.

The Theory on Subwoofer Enclosure Stuffing

Having a look through the owner’s manual for BassBox Pro reveals two very relevant statements about adding damping or stuffing to an enclosure. First, “the acoustical absorption inside the box will increase,” and second, “the box damping will increase, making the box seem bigger than it really is.” Our results confirm the second statement as being the most significant benefit. It should be noted that just as with a larger enclosure, the maximum output level drops, but so does the Q-factor of the system. For those interested in optimizing sound quality, this would seem like an ideal solution. For bass-heads, you might be better off leaving the interior of the enclosure empty to gain those extra few tenths of a decibel in output and efficiency.

Drop by your local specialty mobile enhancement retailer to have them design and construct a subwoofer enclosure that works perfectly for the subwoofers you’ve chosen and the available space in your vehicle.

This article is written and produced by the team at www.BestCarAudio.com. Reproduction or use of any kind is prohibited without the express written permission of 1sixty8 media.

Filed Under: ARTICLES, Car Audio, RESOURCE LIBRARY

What Happens When You Use Undersized Car Audio Power Wiring?

Power Wire

Having your local specialty car audio retailer install an amplifier in your car or truck is a great way to improve the performance of your audio system. The extra power will allow you to turn the volume up higher to extract more from your speakers. If you have a subwoofer installed, you’ll need to choose an amplifier that can produce lots of power. While there are some subwoofer, enclosure and amplifier options that represent excellent value, it’s pretty rare to find a deal on power wire. Delivering power to your amplifier is crucial to its performance and longevity. In this article, we will take a look at what happens when you skimp out on the power wire for your amplifier.

Why Is Power Wire Quality Important?

Unlike home audio and professional public-address audio systems, car stereos are asked to produce massive amounts of power from a relatively low voltage. For example, a 1,000-watt home theatre subwoofer amp might draw 10 to 11 amps of current from a wall outlet. A similarly powerful car audio amplifier will need to draw almost 100 amps from the charging system to deliver the same power to a subwoofer.

What does this have to do with power wire? In the 1880s, Nikola Tesla realized that transmitting power to homes at high voltages reduced losses due to the resistance of power cables. Power is calculated by multiplying the square of the current through a load by the resistance of that load. In the case of undersized wiring, the cable itself can become a significant load.

A good-quality four-AWG conductor should have a resistance of 0.268 milliohms per foot. Let’s look at an example where we have a run of 17 feet from the battery to an amp in the back of an SUV. Let’s also say the amplifier can produce about 1,000 watts of power, and as such, needs to draw 100 amps of current. Using good-quality, full AWG-spec four-AWG cable, there will be a drop of 0.456 volts across the power wire and 45.6 watts of heat generated. Since most vehicles have a chassis with a similar ground return path resistance, we lose another half-volt or so. Now, our amplifier is only seeing 12.4 volts instead of maybe 13.4 when the truck is idling. This voltage drop limits how much power it can produce without distorting and also makes the amp run hotter.

Car audio power wire is constructed from three common materials: pure virgin copper, recycled copper alloys and combinations of copper and aluminum. It’s nearly impossible to find out exactly what’s in the wires available from various brands. This is why the Consumer Technology Associated created the ANSI/CTA-2015 R2017 Mobile Electronics Cabling Standard. This set of guidelines describes not only the size of conductors (cross-sectional area) but the minimum number of strands, the minimum number of strand groups, the nominal resistance and the maximum allowable resistance per meter. Another important note is that the CTA-2015 standard allows for a maximum of 0.25 volt across the length of the cable.

Our Test Victim

Years ago, some of the staff here at BestCarAudio.com performed extensive testing on more than a dozen brands of entry-level car audio amplifier installation kits. Unfortunately, the worst kit of the bunch had wire with more than three times the resistance of the best in the group. That’s a scary proposition, considering all were called Four Gauge.

We asked around to find some inexpensive amplifier kits and one solution that came up a few times was the four-AWG kit sold by Princess Auto in Canada. Princess Auto is a chain of stores very similar to Harbor Freight in the U.S. We purchased their four-gauge amp kit for our test. The kit claims to include 17 feet of “4-Ga” clear matte power cable, 3 feet of ground cable and a nickel-plated ANL fuse holder with a 120-amp fuse. We measured the power wire, and it came in at 17 feet and 0.625 inch. The ground wire was 35.75 inches. Partially hidden under the fuse holder is a label stating “W/AWG Standard,” and the bottom of the packaging has “1600W” emblazoned across it. We assume that this label implies that a true four-AWG amp kit is suitable for use with an amp that can produce up to 1,600 watts of power.

We’ll use an ARC Audio ARC1000.2 amplifier rated to produce 1,200 watts of power into a 4-ohm load for our test. We’ll use our D’Amore Engineering AMM-1 to set the output of this very efficient amplifier to specific power levels to see how the wire behaves.

Power Wire
It’s clear to see from a photograph of the wire that it’s constructed primarily of aluminum instead of copper.

Wire Performance Test

If we analyze the chart below, we can see that the resistance of the wire increases as the current demands increase. However, the resistance remains relatively stable around 8.8 milliohms up to 40 amps of current flow. At this level, the amplifier is producing about 450 watts of power to our load resistor bank. If this was a product we were selling, that’s where we’d set the current limit.

Power Wire
Power wire resistance vs. amplifier current draw

As you can see, at current draw levels above 90 amps of current, the resistance started to skyrocket. At 110 amps, which was close to 1,175 watts of power to the dummy loads, the resistance increased to 9.7 milliohms, and the wire was at almost 50 degrees Celsius.

Power Wire
Voltage drop across the 17-foot run of power wire vs. current draw

Part of our test included measuring the voltage across the power wire from where it was connected to our supply to where it connects to the amplifier. The voltage drop increased to more than 1 volt across the power wire at just over 105 amps of flow. Had we left the amp playing, the wire temperature and resistance would increase further, and the voltage drop would increase.

How Does the Princess Auto Amp Kit Stack Up?

If we were selling this amp kit and intended to follow the maximum allowable voltage drop of 0.25 volt, this kit would be capable of powering a roughly 350-watt amplifier. Unfortunately, that’s a pretty far stretch from the claimed 1,600 watts listed on the packaging.

If we wanted to be a little more generous, the wire started to heat up when flowing 90 amps of current. If you’re into playing marketing games, then perhaps this is good for an 800-watt amplifier? That said, we’d rather not waste 0.6 volt across the run of wire.

According to the ANSI/CTA-2015 standard, a 17-foot run of four-AWG cable should have a nominal resistance of 4.55 milliohms and maximum resistance of 4.818 milliohms. At 8.783 milliohms, this is almost twice the resistance of a good quality cable. Let’s revise our voltage drop chart and scale the resistance of this cable by 55% to see what happens.

Power Wire
A comparison of voltage drops between our CCA conductor and a copper conductor.

In reality, the difference between the two conductors would be more considerable because the copper cable wouldn’t heat up as much, and the resistance would increase less.

Car Audio Power Wire Matters

It takes power to make power. If you can deliver more voltage to the amplifier in your car or truck, it can provide more power to your speakers and do so with less wasted energy and distortion. Skimping on power wire quality simply isn’t worth the small cost saving. Instead, talk to your local specialty mobile enhancement retailer about using high-quality, full American Wire Gauge (AWG) spec wiring when they install your amplifier. The investment will be worth every penny!

This article is written and produced by the team at www.BestCarAudio.com. Reproduction or use of any kind is prohibited without the express written permission of 1sixty8 media.

Filed Under: ARTICLES, Car Audio, RESOURCE LIBRARY

Benefits and Drawbacks of Inverting Your Car Audio Subwoofers

Inverted Subwoofers

When designing a car audio subwoofer system, the Product Specialist and Installer you’re working with have two options for mounting subwoofers in your enclosure. There is, of course, the typical method with the motor assembly and basket inside the enclosure. With that said, many installations have the subwoofers mounted upside down, or as many call it, in an inverted fashion. There are benefits and drawbacks to this installation method – let’s talk about it!

Benefits of Inverted Subwoofer Installation

The most significant benefit of having your subwoofers installed such that the motor assembly and basket are visible is cooling. The heat generated in and around the voice coil and magnet can easily escape into the air in the vehicle. Access to all the relatively cool air in the vehicle can dramatically improve thermal power handling, especially compared to an acoustic suspension (sealed) enclosure.

Inverted Subwoofers
Three of the new ARC Audio A-Series shallow-mount subwoofers in the back of Fred Lynch’s Ford Flex SUV.
Inverted Subwoofers
Jason Ewing installed an Audiofrog GB12 subwoofer in the trunk of his Subaru WRX.

The second benefit of an inverted subwoofer installation is mounting depth. With only the cone inside the enclosure, you can install deep subwoofers in locations with minimal mounting depth. Yes, you’ll have a large woofer protruding from the enclosure’s front, which may affect your vehicle’s cargo carrying capacity.

Extending this same philosophy regarding depth, another small benefit of inverted subwoofer installations is increased enclosure volume. Subwoofers with large baskets and motor assemblies can easily displace 1/10th of a cubic foot. Thus, your installer can reduce the size of the enclosure or use that extra airspace to improve the low-frequency output of the subwoofer system. The difference isn’t likely to be dramatic, but more deep bass is always a good thing!

Inverted Subwoofers
A GB10 10-inch subwoofer flanked by a pair of AudioControl amplifiers in the trunk of a Fiat 500 Gucci Edition by Andrew Evens.
Inverted Subwoofers
One of the new JBL Arena X subwoofers installed in the back of Natan Budiono’s amazing Suzuki SX4.

Drawbacks of Having Your Subwoofers Upside Down

There are some drawbacks to inverted subwoofer installations. First, it’s challenging to protect the rear of the subwoofer and the wiring from damage caused by cargo. This isn’t the sort of installation you’d choose for a daily driver that’s also used to get groceries or go on vacation. On the other hand, it might be great for a company demo vehicle or a show car where there’s a conscious and consistent effort to keep things safe.

Inverted Subwoofers
This pair of JL Audio 12W6 subwoofers is a flashback to 2007 in this BMW 3-series convertible.

It can be tricky to come up with a way to keep the wiring to the subwoofer’s voice coils looking tidy. Inside an enclosure, so long as the electrical connections are solid, few care how the wiring looks. When the wiring is visible, then terminations and wire routing become a genuine consideration. Protecting those connections from damage or from objects that might short the terminals is also an issue.

Inverted Subwoofers
Sometimes subwoofers are just too big! Our friend Paul Bennett shared this photo of a pair of Crossfire subwoofers in the back of a sedan.
Inverted Subwoofers
A Honda Vezel (HR-V) with three GB12 subwoofers installed by Safe and Sound Systems Limited from San Fernando, Trinidad and Tobago.

The next drawback is a minor reduction in efficiency. No, the operation of the subwoofer doesn’t change, but the effective cone area might be reduced. When the woofer is mounted conventionally, you have the entire cone surface available to pressurize and rarefy the air in the vehicle. When mounted upside down, the area of the cone inside the voice coil may not contribute to moving air. This effect depends somewhat on the design of the woofer. If there’s a vented pole piece, the change will be minimal.

Inverted Subwoofers
Harold Jones has a Focal Utopia subwoofer mounted in the corner of his Hyundai Veloster.
Inverted Subwoofers
An ARC Audio ARC 15 subwoofer installed in the trunk of our friend Howard Cantor’s 2019 Toyota Camry.
Inverted Subwoofers
A trio of Kicker L7 Subwoofers installed in the back of the “Thumping Pumpkin” Audi TT.

Lastly, and perhaps the most significant drawback of having a subwoofer mounted in an inverted fashion, is the chance for unwanted noise. Not all voice coil cooling systems are quiet at high excursion levels. Airflow around the coil, top plate and in and out of vents may add unwanted huffing and chuff at high output levels. There is also a chance that tinsel leads can make noises if they come into contact with the cone when played loudly. Unfortunately, if you have a subwoofer that makes these kinds of noises, there’s typically no easy way to remedy the issue. It’s best to mount those subs in a conventional cone-out installation. Your installer can test the subwoofers by applying a signal to them and listening for noise without any enclosure. Be careful not to bottom out the woofer, though.

Inverted Subwoofers
The team at KustomEis in Regina, Saskatchewan, executed this classic installation in the cargo area of a classic IROC Camaro using a JL Audio subwoofer and amplifier.
Inverted Subwoofers
Many years ago, the guys at Clarion Canada installed five PXW1051 subwoofers in the back of their 2005 Mitsubishi Eclipse demo car.
Inverted Subwoofers
A pair of Kaption subwoofers installed in the back of Chris Meyers’ Ford Focus.

Balance the Benefits and Drawbacks

As you can see from the images we’ve included in this article, sometimes the only option is to mount the subwoofers such that the motor assembly and basket are visible. You can discuss your inverted subwoofer installation options with the installer before work begins on your car or truck to ensure that you’ll be happy with the results.

Lead-in Image: Thanks to Matt Schaeffer from Musaic Audiophile Design in Lewes, Delaware, for sharing this installation of a pair of Focal subwoofers in the back of a ZL1 Camaro.

This article is written and produced by the team at www.BestCarAudio.com. Reproduction or use of any kind is prohibited without the express written permission of 1sixty8 media.

Filed Under: ARTICLES, Car Audio, RESOURCE LIBRARY

Who’s the Typical Client for Your Local Car Stereo Shop?

Car Stereo Client

In the ’80s and ’90s, the target demographic at a car stereo shop was men ages 18 to 24. Guys would work to upgrade their cars with subwoofers, pull-out CD players and lots of speakers in hopes of having the loudest audio systems in their group of friends. Not coincidentally, during that time magazines ran advertisements for products with outrageous cosmetics, promoted by scantily clad women. Fast forward a few decades, and the typical client is likely the same person, but their goals and expectations have matured significantly. So let’s look at the typical client for a reputable mobile enhancement retailer today.

Drivers Want Safe Ways To Use Their Phones

One of the most common types of client visiting car stereo shops these days has a 10- to 20-year-old vehicle and wants to upgrade the technology in that car or truck. It might be a Chevy Monte Carlo, Ford F-150 or a Porsche 911. In almost all cases, they want to add a Bluetooth hands-free solution that will let them make phone calls without having the phone in their hands.

Another popular upgrade is multimedia receivers that include Apple CarPlay and Android Auto smartphone integration. Along with hands-free calling, these technologies allow the driver to send text messages using voice commands. They can also search for navigation instructions to a destination almost anywhere in North America using Waze, Google Maps or Apple Maps (the latter only when using an iOS device). Finally, of course, streaming audio is another popular source of music these days. CarPlay and Android Auto include dedicated apps for Spotify, Amazon Music, Pandora, iHeartRadio and Tidal, to name a few.

Car Stereo Client
The Sony XAV-AX5600 is a double-DIN multimedia receiver that includes Apple CarPlay and Android Auto smartphone integration.

In most cases, installing a new multimedia receiver is the solution to these upgrade requests. We’ve covered the basics of buying a new radio in our Car Radio Buying Guide. That guide includes details on radio sizes, features and functions. If there’s a single takeaway from the article, it’s that we recommend that before you buy a radio, test it on a display board. All models aren’t as quick to respond to commands, nor do all of them have intuitive interfaces. Oh, and make sure you connect your phone to the radio to test smartphone integration, as well as Bluetooth hands-free calling and audio streaming. Unfortunately, not every phone is compatible with these technologies.

A few companies, such as AIS and ZZ-2, offer smartphone integration upgrades that will work with the factory display and controls in your vehicle. Check with your local retailer about whether these products are available for your vehicle’s year, make, model and trim level.

Car Stereo Client
Extreme Audio near Richmond, Virginia, upgraded this 2016 BMW 228i with a ZZ-2 CarPlay and Android Auto system that works with the factory-installed infotainment display.

Raising the Bar for Realistic Sound

Back in high school, most of us had a Walkman or, for the slightly younger crowd, a Discman. It was rare to see someone who had upgraded the headphones that came with these devices to something that offered better performance, but it did happen. These days, high-end headphones are a multi-million-dollar industry. As such, more and more people have a higher benchmark for what their music should sound like.

Car Stereo Client
When it comes to reference sound quality, AKG has set the standard for realism, accuracy and consistency in high-end headphones.

The philosophy around wanting better sound from our entertainment systems hasn’t changed, but the customer has. The younger crowd is less likely to visit a stereo shop for an upgrade and more likely to try to do it themselves. The results vary from “Hey, nice work!” to “How is your vehicle not on fire?” Partnering with a specialty mobile enhancement retailer is the best bet for those who want predictable results from their investment. These shops have the products, integration solutions and, most importantly, the training to ensure that you get the best performance possible from the upgrades you choose.

A proper audio system upgrade will start with the installation of sound deadening material to reduce noise transfer into the vehicle. Just like treating the listening room in a high-end home audio or theatre system, this is a crucial step in delivering great sound.

Car Stereo Client
Kartunes Autosound 12 Volt Specialists in Tempe, Arizona, treated the interior of this Toyota Tundra with SoundShield damping material.

The next step in a great audio upgrade is to choose a subwoofer system to help reinforce the bottom octave or two of the music you enjoy. Even the most premium factory-installed sound systems from Bose, Bowers & Wilkins, Bang and Olufson, Lexicon, Burmester or Mark Levinson have difficulty playing music below 35 or 40 hertz. That’s an entire octave (or more) that you’re missing out on. As such, synthesizers, drums, a timpani or purely computer-generated sounds will be missing, and you may find the audio system lacks emotion and impact. Can you imagine watching a movie without feeling the bass impact from an explosion or a helicopter landing? The same goes for listening to your favorite music.

Subwoofers come in all shapes and sizes, and a reputable retailer can design a solution that delivers the bass you want without taking up valuable storage space in your vehicle. The subwoofer system can be configured to blend in with the rest of the speakers in your car or truck and provide the extension you want. They don’t have to be set to wake the neighbors or rattle the rearview mirror.

Car Stereo Client
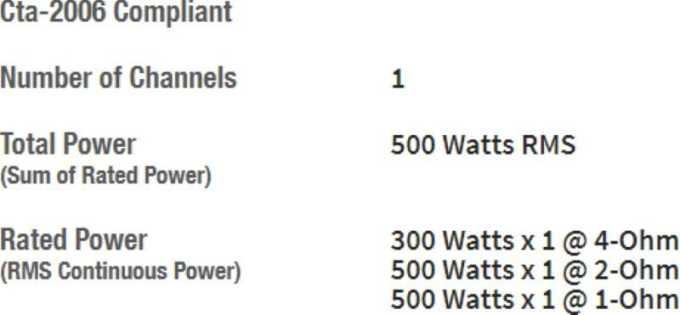
A high-performance subwoofer system like the Rockford Fosgate P300-10 is an easy way to add bass to your car audio system.
Car Stereo Client
Audison’s APBX 10 AS2 powered subwoofer system is a great solution to add bass to a car audio system when space is at a premium.

Seeking Clarity Through Upgraded Speakers

Once you’ve addressed adding a subwoofer system, the next step is to upgrade your speakers and add an amplifier. New speakers reproduce audio signals with improved clarity and, when powered by a high-quality amplifier, allow you to play the audio system at higher volume levels. When buying speakers, or more importantly, picking from the options on the display at your local car stereo shop, be sure to audition them. Yes, they’ll sound different when installed in your vehicle, but that doesn’t mean you shouldn’t make sure they sound great. Harshness, unnatural tonal balance or too much midbass emphasis is only going to be exaggerated once the speakers are integrated into your car or truck.

Car Stereo Client
Sony’s Mobile ES speakers offer impressive features and natural sound, thanks to modern technology and design.
Car Stereo Client
RC Audio’s RS Series speakers deliver studio-quality sound in a premium car audio system upgrade.
Car Stereo Client
The Mille Series of speakers from Hertz delivers fantastic accuracy and smooth tonal balance to bring your music to life.

They Care Enough To Include System Calibration

Digital signal processors are a necessity when it comes to delivering great sound in your vehicle. The acoustics in our cars, along with unequal path lengths to speakers, wreak havoc on imaging and staging. Having your audio system configured and calibrated using a DSP by someone intimately familiar with the process is crucial to experiencing your music the way the engineer who mastered the recording heard it. Proper instrument and performer placement on the soundstage, along with neutral and accurate tonal balance, are only achieved when the equalization, signal delay and crossovers are set properly.

Car Stereo Client
High-performance amplifiers such as the ARC Audio ARC 1000.4 DSP include powerful signal processors that can make your audio system sound unforgettable.
Car Stereo Client
The Audison AP F8.9 bit is an eight-channel amplifier with a nine-channel digital signal processor for system configuration and calibration.

They Seek Perfection in Design and Integration

Another observation about today’s car audio upgrade landscape revolves around system design and integration. Many car audio shops can install a set of speakers or replace a radio. Fewer have the skills to design a proper custom subwoofer enclosure. Even fewer again have the tools and training to configure and calibrate a digital signal processor properly.

Finding a shop that can do this all properly and execute the installation in a way that makes the upgrade look like a part of the vehicle rather than a bolted-on afterthought is, well, truly rare. Our point: You’re going to have to have to shop for the right company to work on your car or truck. You want it to be treated with respect while it’s in their bay, and you’ll want an audio upgrade that sounds magnificent and functions reliably. The process may take some time, but partnering with a genuine professional is worth the effort.

Car Stereo Client
A simple false floor for your amplifiers is an excellent way to maintain cargo space while protecting your audio gear. Thanks to Andrew from Burlington, Ontario, for the image of his Ford SUV.
Car Stereo Client
Simplicity in Sound in Milpitas, California, created this custom amp rack and subwoofer installation in the trunk of a 2010 Lexus IS-F sedan.
Car Stereo Client
Musaic Audiophile Design in Lewes, Delaware, installed an Illusion Audio Carbon C10 subwoofer in this 2015 Tesla Model S cargo area.
Car Stereo Client
With no stock mounting locations available, the team at Musicar Northwest in Portland, Oregon, created bespoke pods for this 2009 Ferrari F30 Spyder and its new Morel tweeters.

They Crave Precision in Speed Trap Detection

For those with a heavy right foot, upgrading a vehicle with a radar detector and laser defense system is an excellent investment. The latest technologies offer exceptional long-range sensitivity to all types of police radar. At the same time, their digital processing helps to reduce or eliminate false alarms from adaptive cruise control and collision avoidance systems. Of course, you have many options when it comes to having these systems integrated into your vehicle. The display and control panel can be attached to your dash or center console, or you can work with an expert who can create custom mounting solutions that make these a part of your vehicle interior. The same goes for laser shifters. Vehicle-specific acrylic mounts help to conceal these pods and make them nearly invisible.

Car Stereo Client
Musicar Northwest integrated the controls for this AL Priority laser and radar defense system into the center console of this 2017 Porsche Panamera.
Car Stereo Client
The Escort Max Ci front laser shifters on this Tesla Model S are concealed behind custom-molded acrylic mounts for a clean and tidy look.

They Want Their Vehicle Treated with Respect

We could go on and on about how installing a remote car starter is crucial to its reliability and how the wiring for a dashcam should be run carefully around airbags. We think you get the message that high-quality car audio and accessory upgrades are now something a more mature client is after. Invest the time in choosing the right shop that offers the right products and solutions to work on your vehicle.

Lead-in Image: Thanks to Shon Besharah of 6Thirteen Auto Design near Ottawa, Ontario, for sharing this image of a custom vehicle interior and subwoofer system he created.

This article is written and produced by the team at www.BestCarAudio.com. Reproduction or use of any kind is prohibited without the express written permission of 1sixty8 media.

Filed Under: ARTICLES, Car Audio, RESOURCE LIBRARY

Subwoofers and Amplifiers – Let’s Talk About Ohms and Loads

Amplifier Load

A few weeks ago, we were browsing a few car audio related Facebook groups and Reddit subreddits. We saw the same question come up time after time: “I have two dual 2-ohm voice coil subs; how do I show the amp a 1-ohm load to make max power?” It wasn’t just once or twice that this question was asked – we saw it and versions of it at least a dozen times in less than an hour of browsing. Clearly, this is a topic that consumers struggle to understand. Subwoofer wiring configuration is crucial information if you’re shopping for an amplifier to mate to an existing set of subwoofers, or vice-versa.

Subwoofer Voice Coil Impedances

We’ve talked about single- and dual-voice coil designs in the past. In essence, they exist to provide the Product Specialist designing your car audio system with different wiring options so that they can maximize the performance of your subwoofer amplifier.

We’ll be clear: A single voice coil subwoofer isn’t “better” than a dual voice coil sub, or vice versa. The only benefit of a DVC sub is that the coils can be wired in series, in parallel, or each can be fed directly to an amplifier channel. There are benefits in terms of installation flexibility, but the number of connections to the voice coil doesn’t improve the driver’s performance or sound quality.

In subwoofers available from professional mobile enhancement retailers, you’ll typically see either single 2-ohm or single 4-ohm drivers and dual 2-ohm or dual 4-ohm offerings. There are some unique offerings as well. The JL Audio W7AE drivers have a single 3-ohm coil, so three drivers can be wired together to present a 1-ohm load to an amp. Audiotec-Fischer has some quad 3-ohm-coil woofers designed to extract maximum power from its line of non-bridgeable amplifiers.

When you get into some competition-level subwoofer products, you may see some dual 1-ohm coil configurations. If we think long and hard, we seem to recall hearing about a quad 0.7-ohm coil competition-level subwoofer. Nevertheless, there are a lot of options available.

Picking the Final Load Impedance

When it comes to wiring subwoofers to an amplifier, your installer has a few wiring options: parallel, series and series-parallel. The voice coils of a single dual-voice-coil woofer can also be wired in series or parallel. The goal of the options is to present the amplifier with a net impedance that allows it to make the best use of the available power.

You see, most subwoofer amplifiers produce more power as the load impedance drops. If we look at an amp like the ARC Audio X2-1100.1, it’s rated to produce 350 watts into a 4-ohm load, 600 watts when connected to a 2-ohm load and 1,100 watts when the subwoofers are wired to present a 1-ohm load. If you’ve purchased this amp, it only makes sense to present it with a 1-ohm load so that you get the most power available for your investment.

Here’s a small aside about amplifiers: Many subwoofer amps don’t make more power into lower impedances yet are still designed and listed as capable of running these loads. For example, the Rockford Fosgate T1500-1bdCP is rated to produce 1,000 watts when connected to a 4-ohm load, then 1,500 watts when wired to a 2- or 1-ohm load. The same goes for the Hertz Mille Power 1. It produces 600 watts into a 4-ohm load and 1,000 watts when connected to a 2-or 1-ohm configuration.

We highly recommend wiring these amplifiers to 2 ohms. The higher impedance will improve the amplifier’s efficiency, allowing you to deliver more power to your subwoofers with less draw on your electrical system.

Subwoofer Wiring Options

Let’s start by looking at wiring pairs of subwoofers to an amplifier. The simplest would be two 4-ohm single-voice-coil subwoofers wired in parallel. Two identical loads wired in parallel present a single load that is half of the single-load impedance. In this case, two 4-ohm subwoofers present the amplifier with a net 2-ohm load.

Amplifier Load
One of the most popular subwoofer wiring configurations: two SVC woofers wired in parallel.

If you have an amplifier like the Rockford Fosgate T1500-1bdCP that we’ve used in the drawings that include a pair of terminals, you can wire one sub to each terminal. The two positive terminals are wired together inside the amp, so are the negative terminals. Having two sets of terminals can help keep the wiring neat and tidy in installations like this.

Amplifier Load
Just as with the image above, this shows two SVC subwoofers wired in parallel to an amplifier with dual output terminals.

In both of the above scenarios, the load the amp “sees” is half of the impedance of one woofer. The chart below shows you the net load for common subwoofer options.

Amplifier Load

A less common configuration is to use low-impedance drivers and wire the subwoofers in series. Series wiring results in the sum of each voice coil impedance being added. For a pair of 4-ohm woofers wired in parallel, the amp would “see” an 8-ohm load.

Amplifier Load
A very uncommon subwoofer configuration: two SVC woofers wired in series.

Amplifier Load

A quick note about wiring subwoofer voice coils in series: Sometimes it’s necessary when multiple drivers are involved. With that said, there is a small drawback. The inductance of the individual voice coils adds and can result in a very reactive load for the amplifier. This configuration can cause instability in lower-quality amplifiers and reduce mid-bass performance from the system. The latter can result in difficulty getting the sound from the subwoofers to blend with the midbass woofers so that the bass appears to be coming from the front of the vehicle. It’s more important to present the amplifier with the correct load, but keep this in mind.

Dual Voice Coil Subwoofer Wiring

Let’s start by looking at the options to wire a single DVC subwoofer to an amplifier. We have the choice of wiring the individual coils in series or in parallel.

Amplifier Load
A single DVC subwoofer with both coils wired in parallel.

Amplifier Load

Amplifier Load
A single DVC subwoofer with both coils wired in series.

Amplifier Load

Wiring multiple dual voice coil subwoofers to a single amplifier presents a whole gamut of options. For example, we can wire all the coils in series, all in parallel, or mix them in a combination of series and parallel. It’s crucial to note that each DVC subwoofer in the system needs to be wired the same way. If one has its coils wired in series, all of them need to be wired in series. The same goes for wiring them in parallel. We’ll explain with a few examples.

Let’s start with an example of two dual-voice coil subwoofers with all four coils wired in parallel. This is a common configuration for dual 4-ohm subs wired to an amplifier optimized to make power into a 1-ohm load.

Amplifier Load
Two dual-voice-coil subwoofers with all coils wired in parallel.

In this example, the load seen by the amplifier is one-quarter the value of each coil. So, for 4-ohm voice coils, the amp will see a 1-ohm load.

Amplifier Load

It is also possible to wire all four voice coils in series. This might be an option for drivers with very low impedance coils, like a dual 1-ohm design. Just as with our single voice coil subwoofers, wiring in series adds the impedance of each coil. This is a very unlikely configuration in a car audio system.

Amplifier Load
Two dual-voice-coil subwoofers with all coils wired in series.

Amplifier Load

Now that you’ve had a taste of how subwoofers and their voice coils can be wired in series or parallel, let’s combine both to create what is easily the most common configuration: two dual-voice-coil subwoofers with their coils wired in series, and both drivers wired in parallel with each other. In this configuration, the amplifier “sees” a load that’s equivalent to the impedance of a single coil.

Amplifier Load
Series-parallel wiring is the most common configuration for multiple subwoofers.

Amplifier Load

You can wire more than just two subwoofers together in series, parallel and series-parallel wiring. Four, eight or even 16 subwoofers can be driven from a single monoblock amplifier, so long as the net impedance is correct.

Amplifier Load
Series-parallel wiring with a quartet of subwoofers can produce some serious bass output.

Amplifier Load

Two Amplifiers on a Single Subwoofer

If you have a dual voice coil subwoofer and would like your installer to use two amplifiers or all four channels of a four-channel amplifier, the electrical connections are quite easy. In either scenario, your installer will need to use a digital scope with a voltage readout or a high-quality digital multimeter to ensure that each coil is receiving exactly the same voltage. In addition, the subwoofer will need to be chosen such that each coil’s impedance maximizes the power available from the amplifier.

Amplifier Load
A single DVC subwoofer powered by two separate amplifiers.

If you want to use a four-channel amp, then the connections to the subwoofer are the same. One coil will be wired to channels one and two in a bridged configuration and the other coil to channels three and four when bridged. In almost all cases, a four-channel amp will want each pair of bridged channels to see a 4-ohm load, so a subwoofer with dual 4-ohm voice coils is the only choice.

Amplifier Load
A single subwoofer driven with all channels of a four-channel amplifier.

A Few Rules To Keep in Mind

There are a few guidelines to keep in mind as you and the Product Specialist you’re working with discuss your system design. First, all subwoofers connected to an amplifier should have the same impedance. For example, you can’t use a dual 2-ohm and a dual 4-ohm sub on the same amplifier.

The second rule is that all the voice coils of a DVC or quad-coil subwoofer must be used. If you need a 2-ohm load but have a dual 2-ohm subwoofer, you need to change the amp or the sub in the system design. Using one voice coil changes all the parameters of the woofer and doesn’t promise good sound or reliability.

Last, all the subwoofers should be installed in enclosures with the same air volume. We once heard a “story” where a vehicle owner told us one 12-inch sub was in a small enclosure for fast bass, and the other was in a large enclosure so it would produce deep bass. No. Just No. Please don’t do this. They all need to have the same amount of air behind them in the enclosure to deliver predictable results.

Oh, I suppose we should mention that mixing different size woofers or different models of woofers in one system is also less than ideal. That whole “fast” and “deep” stuff is silly. If you want to use some smaller woofers for midbass, that makes complete sense. This is popular in system applications where high-efficiency PA-style speakers are being used. With that said, very few car audio subwoofers are designed to play up to 250 or 300 Hz without some significant amounts of cone resonance distortion.

Anyway, please don’t mix and match different size subwoofers in a single system. We recommend saving your money and having the subwoofer system designed and installed properly. Your local specialty mobile enhancement retailer can help you choose the best amplifier and subwoofer combination, then design an enclosure that will make the best use of the space in your vehicle, so your stereo system sounds amazing.

This article is written and produced by the team at www.BestCarAudio.com. Reproduction or use of any kind is prohibited without the express written permission of 1sixty8 media.

Filed Under: ARTICLES, Car Audio, RESOURCE LIBRARY

  • « Previous Page
  • 1
  • …
  • 19
  • 20
  • 21
  • 22
  • 23
  • …
  • 94
  • Next Page »

Recent Articles

The back of a car audio subwoofer on one side and a man with a perplexed thinking face looking at it on the other side

Car Audio Myths: DVC Subwoofers Can Handle More Power

June 1, 2025 

We’re back to bust another car audio myth wide open. This article will discuss the myth that DVC subwoofers can handle more power than a single voice coil driver. After some … [Read More...]

DroneMobile XC Connected Dashcam Security System

Product Spotlight: DroneMobile XC Connected Dashcam Security System

May 26, 2025 

Thieves frequently target vehicles from Hyundai, Kia, Toyota, Lexus, RAM, Chevrolet, and Honda. These vehicles are often stolen for their parts or exported overseas. … [Read More...]

Various car audio amplifiers, speakers, and equipment

Car Audio Myth: You Can’t Hear Low-Frequency Distortion

May 25, 2025 

At least once a week, someone comments on social media or in a forum that you can’t hear low-frequency distortion from subwoofers or amplifiers. We have no idea where this myth … [Read More...]

Compustar 2WG17 Remote Kit

Product Spotlight: Compustar 2WG17 Remote Kit

May 19, 2025 

Compustar was one of the first brands to allow consumers to choose a remote control package to accompany their remote start controller. Previously, we looked at flagship-level … [Read More...]

Customer Reviews

Subscribe to Our Website

Enter your email address to subscribe to our website and receive notifications of new posts by email.

Location


Get Directions to Audio Innovations

Audio Innovations

1105 Jim's Lane
Conway, AR 72032
Phone: 501-358-6545

Connect With Us

  • Facebook
  • Instagram

Services

  • Car Audio
  • Driver Safety Systems
  • Marine Audio
  • Motorcycle Audio
  • Radar and Laser Detector Systems
  • Remote Starters

Store Hours

SundayClosed
Monday9:00 AM - 6:00 PM
Tuesday9:00 AM - 6:00 PM
Wednesday9:00 AM - 6:00 PM
Thursday9:00 AM - 6:00 PM
Friday9:00 AM - 6:00 PM
SaturdayClosed

Copyright © 2025 Audio Innovations · Privacy Policy · Website by 1sixty8 media, inc. · Log in


Loading Comments...